This post shares some MCAS-friendly backpacking meals that use generally tolerated ingredients.
I have a chronic illness called Mast Cell Activation Syndrome (MCAS), and I’m not able to tolerate many commercially available dehydrated meals for camping and backpacking. So, this do-it-yourself hack has allowed me to make meals I can tolerate on trail while backpacking.
As an Amazon Associate, I earn from qualifying purchases.
Table of Contents
What is MCAS?
Mast Cell Activation Syndrome (MCAS) is a chronic condition that affects all organ systems. MCAS is serious and disabling and people with MCAS often experience significant and debilitating symptoms daily, including anaphylaxis, which can be fatal.
MCAS is often found in combination with other chronic conditions such as Ehlers-Danlos Syndrome (EDS) and Postural Orthostatic Tachycardia Syndrome (POTS).
Frequently healthcare providers do not know about MCAS, and the tests for MCAS are problematic because they are not uniformly reliable. MCAS can be difficult to manage. Treatments include blocking mast cell mediators with anti-histamines and mast cell stabilizers, as well as avoiding triggers.
Check out this post on how to manage MCAS.
Use foods that you tolerate
I’ve posted here many times before about how to track your MCAS symptoms and find the foods that you tolerate.
This post discusses anti-histamine foods for those with MCAS.
This post highlights the list of the most commonly tolerated foods for those with MCAS.
Dehydrating meals for backpacking
Packaged dehydrated backpacking meals often include problematic ingredients for those with MCAS, sulfur-intolerance, or issues with salicylates or oxalates. I need to avoid garlic, and that is a common ingredient in packaged meals. Packaged backpacking meals are also quite expensive, running between $6 and $18 for a single packet. That adds up quickly if you are planning a trip over a few days!
But when you know your list of tolerated foods, you can adapt recipes to work on the trail. This site (I’m not affiliated with them) offers a ton of recipes that can be customized depending on your dietary needs, and they also sell airtight packaging supplies to store your meals to take on the trail.
Zucchini to the rescue!
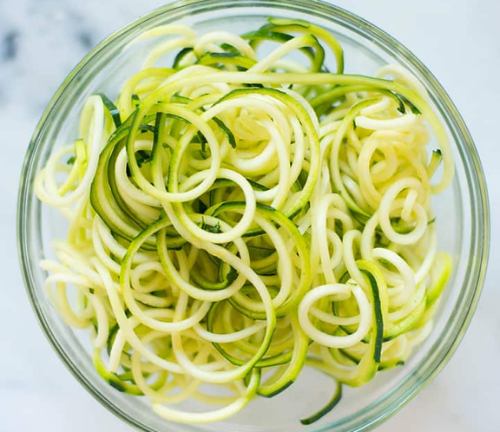
One of my main tolerated staple foods is zucchini. I use it spiralized as noodles, in sheets for lasagna, grated in salads, in quick breads and muffins, and it can even be made into flour. Zucchini has a mild flavor that takes on whatever seasonings you are using.
It’s pretty easy to dehydrate vegetable noodles from spiralized zucchini, daikon radish, and butternut squash. They dehydrate quickly in the oven on the lowest temperature setting, or in a dehydrator.
If you tolerate zucchini you can use the recipes below as-is. Otherwise swap out the zucchini for a food you tolerate, such as summer squash, daikin radish, butternut squash, beet, carrot, or a vegetable of your choice.
Ingredients and supplies for making these meals
I like to use mylar zipper pouches to store my dehydrated meals. These pouches come with oxygen absorbers to keep the meals fresh until you are ready to use them.
I also like to use instant potato flakes in backpacking meals because they are light, filling, and tasty.
To add protein to my backpacking meals I buy freeze-dried chicken. Just remember that once you open the package you will need to either use it all up in meals or reseal it with an oxygen absorber to keep it fresh.
Another ingredient that adds flavor is dried oyster mushroom powder.
How to dehydrate zucchini spirals or “zoodles”
To dehydrate zucchini spirals in the oven:
- Preheat the oven to a low temperature, usually between 150°F and 200°F
- Trim the ends of the zucchini and use a spiralizer to make thin linguini-sized “noodles”
- Place the zucchini spirals on a baking sheet
- Dehydrate for 6–12 hours, or until the zucchini noodles are dry and brittle and break instead of bending
To dehydrate zucchini spirals in a dehydrator:
- Prepare the zoodles using a spiralizer to cut the zucchini into linguini-sized noodles.
- Arrange the zoodles on the dehydrator trays, leaving space between them for air circulation. A mesh tray liner can prevent the zoodles from falling through the holes.
- Set the dehydrator to a temperature between 125°F and 140°F, depending on your machine. Dehydrate for 6–12 hours, or until the zoodles are dry and brittle enough to break instead of bend. Depending on your machine, you may need to rotate the trays occasionally to promote even drying.
Three backpacking meals using dehydrated “zoodles”
Here are a couple of dehydrated backpacking meal recipes using dehydrated “zoodles.”
Dehydrated Zucchini Stroganoff
Equipment
- dehydrator or oven
Ingredients
- 1 medium zucchini spiralized and dehydrated
- 1 tbsp butter powder optional
- ½ cup instant potato flakes
- 1 tsp sea salt
- 1 tsp mushroom powder
- ½ cup freeze-dried diced chicken
- ½ tsp dried basil
Instructions
- Place the dehydrated spiralized zoodles into a sealable pouch, such as a mylar zipper pouch. Add the remaining ingredients.
- Add an oxygen absorber packet (available online) to the pouch before sealing it.
- Using an iron on the "cotton" setting, and a wooden board as your ironing surface, seal the pouch shut with the heat of the iron. Make sure to have the steam setting turned off while doing this.
- To rehydrate the meal, boil a cup of water. Open the pouch and add the boiling water, stirring the ingredients briefly. Zip the pouch closed and let sit for about five minutes to rehydrate.
Here’s an Asian-inspired recipe:
Dehydrated Zucchini Curry
Equipment
- dehydrator or oven
Ingredients
- 1 medium zucchini spiralized and dehydrated
- 1 tsp sea salt
- 1 tsp turmeric powder
- 1 tsp dried oyster mushroom powder optional
- ½ cup freeze-dried diced chicken
- ¼ cup hemp hearts
- ½ tsp dried ginger powder
- 1 tbsp dried coconut cream powder
Instructions
- Place all of the ingredients in a mylar zipper pouch. Add an oxygen absorber. Use a wooden board as your work surface, and seal the mylar bag using an iron set on the "cotton" setting. (Make sure the steam is turned off)
- To rehydrate the meal, boil a cup of water. Open the pouch and add the water, stirring briefly. Zip the pouch closed and let sit for about five minutes to rehydrate. Enjoy!
The bucket theory
The bucket theory offers a helpful analogy for understanding symptom reactions with MCAS.
Think of your body as an empty bucket that you want to keep from overflowing. Different foods and activities fill your histamine bucket at different speeds but they combine to form the total level of histamine in your body (how full your bucket is). A fuller bucket means you have more histamine symptoms. When you manage triggers, reduce exposure to known triggers, and take medications and supplements to reduce histamine, you can manage the level of your bucket.
Know your typical symptom progression
Knowing your symptom progression in a symptom flare is the key to developing your rescue plan. In this post, I discuss how to determine your symptom progression. Once you know what typically happens in your symptom progression you can design a rescue plan to address those symptoms.
Get my free ebook, symptom log, and meal plan!
Want a tool to easily keep track of your symptoms? Sign up for my newsletter and you will receive my free 50-page ebook of lower-histamine, grain-free, sugar-free recipes, my free symptom log, and a free two-week meal plan!
Sign up for the SSP!
The SSP is a listening therapy based on Polyvagal Theory created by Stephen Porges to unlock your ability to think, feel, and connect better through nervous system regulation. You use the SSP via an app on your phone and listen with over-the-ear headphones to specially filtered music that heals the nervous system, specifically the vagus nerve. You subscribe to the app with a provider like me and listen to the specially curated music for 30 minutes each day for a 5-hour cycle. Studies show the SSP has a profound effect on mental health and chronic conditions
You can sign up for the SSP here!
Order my book!
Rocks and Roots chronicles my journey solo backpacking the Superior Hiking Trail and overcoming nervous system dysregulation, gut dysbiosis, and Mast Cell Activation Syndrome symptoms to hike 328 miles successfully.
Check out this powerful frequency device
Healy is an individualized microcurrent device I use to reduce inflammation. Check out this post for more about Healy.
Sign up for a session!
I provide one-on-one in-person and remote chronic illness and caregiver coaching and Sacred Self-Healing Sessions based on the Sacred Self-Healing Method, a proven novel co-creative healing modality detailed in my Books.
Click here for more information.
What do you think?
I’d love to have your reply below!
Disclaimer
The preceding material does not constitute medical advice. This information is for information purposes only and is not intended to be a substitute for professional medical advice, diagnosis, cure or treatment. Always seek advice from your medical doctor.


